
 Mari Kibe
Mini Cheesecake: Your New Go-To Sweet Treat!
Let’s face it, folks—life can get a little chaotic, especially when you’re juggling work, family, and that ever-growing list of things to do. If you’re searching for a delightful dessert that supports your busy lifestyle, look no further than this Mini Cheesecake recipe! These little gems are not just eye-catching but also incredibly easy to whip up, making them perfect for celebrations, movie nights, or just a sweet treat after a long day.
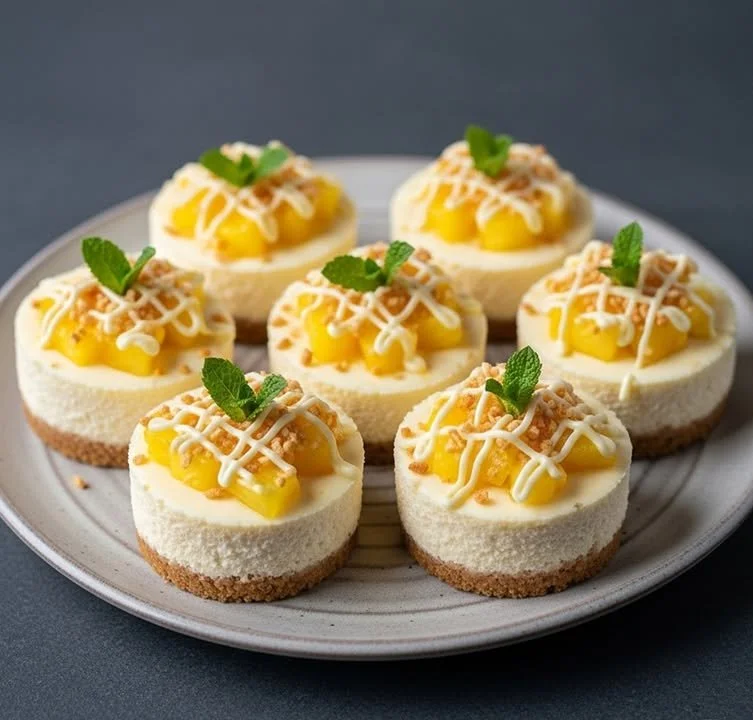
Why You’ll Love This Mini Cheesecake
Mini cheesecakes make everything better! They’re adorable, portion-controlled (so you can pretend you’re being healthy), and endlessly customizable. Picture this: after a chaotic day, you can sit down with a mini cheesecake, a hot cup of tea, and indulge in the magic of creamy goodness. What’s not to love? Plus, it’s a recipe where your kids can help out—just watch them steal the cookie crumbs!
Ingredients: The Stars of Your Cheesecake Show
Before we jump into the instructions, let’s gather our ingredients. Trust me; it’s all about simplicity here. Here’s what you’ll need:
-
For the crust:
- 1 ½ cups graham cracker crumbs
- 1/4 cup granulated sugar
- 1/2 cup unsalted butter, melted
-
For the filling:
- 16 oz cream cheese, softened
- 1/2 cup granulated sugar
- 2 large eggs
- 1 teaspoon vanilla extract
- 1/4 cup sour cream (optional for extra creaminess)
And if you’re feeling adventurous (or have a fruit-loving audience at home), fresh berries or chocolate chips make excellent toppings!
Steps to Mini Cheesecake Perfection
1. Preheat That Oven!
Start by preheating your oven to 325°F (165°C). This is where the magic begins!
2. Crust Creation
In a bowl, combine the graham cracker crumbs, sugar, and melted butter until the mixture resembles wet sand. This is your mini cheesecake’s cozy little bed! Press about one tablespoon of this mixture into the bottom of each muffin cup lined with a paper liner.
3. Filling Up with Flavor
In a large mixing bowl, beat the softened cream cheese and sugar together until creamy and smooth. You can use a hand mixer or stand mixer for this—you know, the one that always seems to get stuck in the back of the cabinet? Add the eggs one at a time, mixing well after each addition. Don’t forget to toss in the vanilla and sour cream to amp up that creaminess!
4. Pour and Bake!
Spoon the creamy filling into each prepared crust. Fill them about three-quarters full to give them room to rise without overflowing. Pop these beauties into the oven and bake for about 20-25 minutes, or until the centers are set but still slightly jiggly.
5. Chill Out
Once cooled, let them chill in the fridge for at least two hours. Trust me, they’re worth the wait!
Cooking Tips for the Ultimate Mini Cheesecake
- Don’t Overmix: When you’re mixing the filling, avoid over-whipping it. This keeps your cheesecakes from being too airy and preserves that rich, creamy texture we all love.
- Flavor It Up: Want to turn the flavor dial up? Try adding a little lemon zest for a refreshing twist or a spoonful of your favorite jam on top before serving!
- Leftovers?: If you have any leftovers (and that’s a big if), store them in the refrigerator for up to 3 days. They can also be frozen for an extra treat down the line.
Personal Anecdotes: A Sweet Secret
I still remember the first time I made mini cheesecakes for my niece’s birthday. The look on her face when she took a bite was priceless! Each guest had a different topping preference, from chocolate syrup to fresh fruit, making it a fun, interactive dessert. It was definitely a first-day-of-spring type of moment that reminded me how food can bring a crowd together.
FAQs About Mini Cheesecakes
-
Can I use low-fat cream cheese?
Absolutely! Just know that the texture might be a little different, but they will still be yummy. -
What can I use instead of graham crackers?
Crushed Oreos or even digestive biscuits work wonderfully—feel free to get creative! -
Can I make these in advance?
Yes! In fact, they’re even better if made a day ahead. Just keep them covered in the fridge.
Now armed with this Mini Cheesecake recipe, go out there and impress family and friends—or simply treat yourself because you deserve it! Embrace the smiles and satisfaction that come with each creamy bite. And remember, cooking isn’t just about the food; it’s about the joy and memories we create around it. Happy baking!
Wrap It Up
So there you have it, folks! Mini cheesecakes are your new secret weapon for a quick sweet fix. They’re easy, delicious, and absolutely guaranteed to put a smile on your face. Trust me when I say, once you start making these, they’ll become a staple in your dessert repertoire. Enjoy this delightful recipe and whatever sweet moments come from it!

Mini Cheesecake
Ingredients
For the crust
- 1.5 cups graham cracker crumbs
- 0.25 cups granulated sugar
- 0.5 cups unsalted butter, melted
For the filling
- 16 oz cream cheese, softened
- 0.5 cups granulated sugar
- 2 large eggs
- 1 teaspoon vanilla extract
- 0.25 cups sour cream optional for extra creaminess
Optional toppings
- fresh berries or chocolate chips for serving
Instructions
Preparation
- Preheat your oven to 325°F (165°C).
- In a bowl, combine the graham cracker crumbs, sugar, and melted butter until the mixture resembles wet sand.
- Press about one tablespoon of this mixture into the bottom of each muffin cup lined with a paper liner.
- In a large mixing bowl, beat the softened cream cheese and sugar together until creamy and smooth.
- Add the eggs one at a time, mixing well after each addition, then add the vanilla and sour cream.
- Spoon the creamy filling into each prepared crust, filling them about three-quarters full.
- Bake for about 20-25 minutes, or until the centers are set but still slightly jiggly.
- Once cooled, let them chill in the fridge for at least two hours.